Multi-Crew Ship Operations: Maximizing Your Crew's Effectiveness
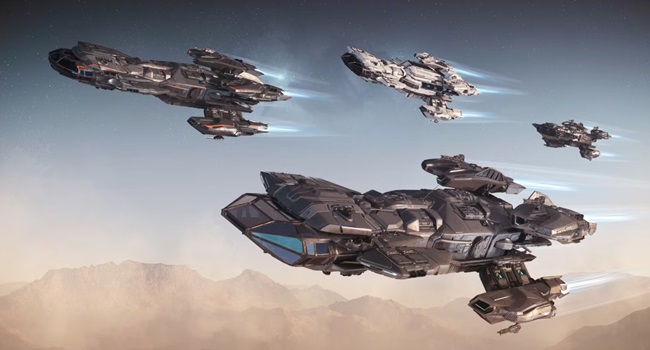
Master multi-crew ship operations in Star Citizen. Learn crew role assignments, coordination strategies, and communication protocols for maximum effectiveness.
Multi-crew ships transform Star Citizen from a solo experience into a cooperative adventure. But throwing players into a Hammerhead without coordination is a recipe for disaster. Here's how to run multi-crew operations that make your ship a force to be reckoned with.
Understanding Multi-Crew Roles
Every crew position serves a critical function:
Pilot:
- Ship navigation and maneuvering
- Quantum travel decisions
- Overall tactical positioning
- Communication with fleet command
- Final authority on ship actions
Co-Pilot:
- Power management and distribution
- Shield management and redistribution
- Scanning and radar operation
- Navigation assistance
- Backup pilot capability
Turret Gunners:
- Weapons operation and target engagement
- Threat identification and reporting
- Ammunition management
- Coordinated fire with other gunners
- Sector coverage responsibility
Engineer:
- Component repair during combat
- Power rerouting for emergencies
- Fire suppression
- Hull breach management
- System diagnostics and maintenance
Medical Officer:
- Crew health monitoring
- Combat casualty treatment
- Medical supply management
- Triage decisions
- Evacuation coordination
Remote Turret/Missile Operator:
- Missile targeting and launch
- Point defense operation
- Long-range engagement
- Target tracking
- Countermeasure deployment
Use SCORG's event system to assign crew positions before operations and track who's trained for each role.
Ship-Specific Crew Guides
Hammerhead (6-8 Crew)
The Hammerhead is a turret fortress:
Crew Layout:
- 1 Pilot (bridge)
- 1 Co-Pilot/Engineer (bridge)
- 6 Turret Gunners (distributed)
Tactics:
- Pilot maintains broadside to maximize turret coverage
- Gunners assigned to sectors (fore, aft, port, starboard, dorsal, ventral)
- Focus fire called by pilot or designated fire controller
- Engineer manages shields and repairs
- Rotate turret assignments to prevent fatigue
Constellation Series (3-4 Crew)
Versatile multi-role platform:
Crew Layout:
- 1 Pilot (cockpit, controls gimbaled weapons)
- 1 Co-Pilot (missiles, scanning, shields)
- 1 Upper Turret Gunner
- 1 Lower Turret Gunner (or Merlin pilot)
Tactics:
- Pilot engages primary targets with nose guns
- Turret gunners cover flanks and rear
- Co-pilot manages missiles for alpha strikes
- Merlin can deploy for fighter interception
- Coordinate turret fire on called targets
Carrack (4-6 Crew)
Exploration flagship:
Crew Layout:
- 1 Pilot (bridge)
- 1 Co-Pilot/Navigator (bridge)
- 1 Scanner Operator (cartography)
- 1 Engineer (maintenance)
- 1-2 Turret Gunners (defensive)
- Pisces pilot for away missions
Tactics:
- Scanner operator identifies threats early
- Pilot prioritizes evasion over combat
- Turrets are defensive only
- Engineer keeps systems running during long missions
- Pisces deploys for surface exploration
Redeemer (4-5 Crew)
Gunship with devastating firepower:
Crew Layout:
- 1 Pilot (nose guns)
- 2 Turret Gunners (upper and lower S5 turrets)
- 1 Co-Pilot/Engineer
- Optional door gunners
Tactics:
- Pilot positions for turret firing arcs
- Turret gunners focus fire on called targets
- Upper turret handles air threats
- Lower turret handles ground/below threats
- Engineer manages shields during heavy combat
Communication Protocols
Clear comms keep crews alive:
Standard Crew Calls:
- "Contact [bearing], [range], [type]" — Threat spotted
- "Engaging [target]" — Opening fire
- "Shields [face] down" — Shield status
- "Hull breach [location]" — Damage report
- "Engineering to [location]" — Repair needed
- "Medical to [location]" — Casualty
- "Brace brace brace" — Imminent impact
- "Abandon ship" — Emergency evacuation
Communication Priority:
- Emergency calls (hull breach, fire, casualty)
- Threat reports (new contacts)
- Tactical calls (target switches, maneuvers)
- Status reports (ammo, shields, systems)
- General coordination
Channel Discipline:
- Keep transmissions brief
- Don't talk over emergency calls
- Confirm critical orders
- Use standard terminology
- Silence non-essential chatter during combat
Power and Shield Management
The co-pilot's most critical job:
Power Triangle:
- Weapons: Increase for sustained fire
- Shields: Increase when taking damage
- Engines: Increase for evasion or pursuit
Dynamic Management:
- Shift power based on combat phase
- Approaching: Engines high, shields moderate
- Engaging: Weapons high, shields moderate
- Taking fire: Shields high, weapons moderate
- Retreating: Engines high, shields high
Shield Face Management:
- Redistribute shields toward incoming fire
- Call out which face is taking damage
- Pilot should angle ship to spread damage
- Regenerate depleted faces by turning away
- Monitor all faces continuously
Training Your Crew
Competent crews require practice:
Individual Training:
- Each member practices their role solo
- Turret gunners practice in Arena Commander
- Engineers learn component locations
- Medical officers practice triage
- Pilots practice multi-crew maneuvering
Crew Drills:
- Weekly crew practice sessions
- Simulated combat scenarios
- Emergency procedure drills
- Communication exercises
- Role rotation for cross-training
Evaluation:
- Track crew performance metrics
- Identify weak points
- Provide constructive feedback
- Recognize improvement
- Adjust training focus
Use SCORG's event system to schedule regular crew training sessions.
Boarding and Being Boarded
Multi-crew ships face unique threats:
Anti-Boarding Measures:
- Lock all doors during operations
- Assign security roles for internal defense
- Stage weapons at key chokepoints
- Monitor internal cameras
- Practice internal defense drills
If Boarded:
- Sound alarm immediately
- Seal bridge and engineering
- Security team responds
- Pilot maintains ship control
- Call for external assistance
Boarding Operations:
- Breaching team with heavy armor
- Suppression fire through entry points
- Secure bridge first, then engineering
- Clear room by room
- Establish control of critical systems
Crew Morale and Endurance
Long operations test crew stamina:
Maintaining Morale:
- Rotate boring positions
- Celebrate successes
- Keep communication positive
- Take breaks during long ops
- Share rewards fairly
Shift Management:
- Plan crew rotations for long missions
- Ensure rest periods
- Cross-train for backup coverage
- Monitor fatigue levels
- Know when to end operations
Conclusion
Multi-crew operations represent Star Citizen at its best — coordinated teamwork creating experiences impossible to achieve solo. By clearly defining roles, practicing communication, training regularly, and building crew cohesion, your multi-crew ships become the most powerful assets in your organization's fleet.
The ship is only as good as its crew. Make yours exceptional.