Mining Guide for Star Citizen Organizations: From Solo to Fleet Operations
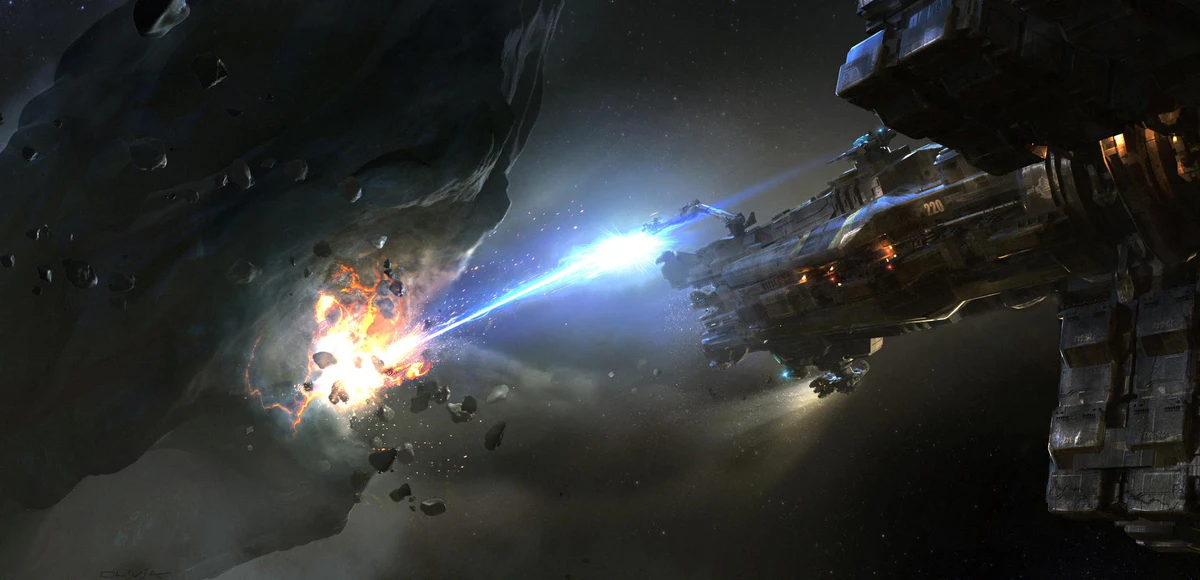
Complete Star Citizen mining guide covering solo prospecting, multi-crew operations, ore types, refining, and organization fleet mining. Maximize profits with…
Mining in Star Citizen offers some of the most lucrative and engaging gameplay in the verse. Whether you're a solo prospector hunting quantanium or coordinating massive fleet operations, understanding mining mechanics and optimization is key to maximizing profits. Here's your complete guide to mining for individuals and organizations.
Understanding Mining Basics
Mining involves locating, extracting, and refining valuable ores:
The Mining Process:
- Scanning: Locate mineral deposits
- Extraction: Break rocks and collect ore
- Transport: Haul ore to refinery
- Refining: Process raw ore into sellable materials
- Selling: Deliver refined materials to buyers
Key Mechanics:
- Laser Power: Must match rock resistance
- Instability: Some ores are volatile (quantanium)
- Fracture: Breaking rocks efficiently
- Extraction: Collecting ore fragments
- Cargo Management: Maximizing valuable ore
Use SCORG's economy system to track ore prices and coordinate mining operations with your organization.
Mining Ships Overview
Choose the right ship for your operation:
Solo Mining Ships
Prospector:
- Cargo: 32 SCU
- Mining Heads: 1
- Crew: 1
- Best For: Solo quantanium hunting
- Profit Potential: 100,000-250,000 aUEC per run
- Strengths: Agile, efficient, affordable
- Weaknesses: Limited cargo, single head
ROC (Ground Vehicle):
- Cargo: 8 SCU (requires transport ship)
- Mining Heads: 1 (laser arm)
- Crew: 1
- Best For: Surface gem mining
- Profit Potential: 50,000-150,000 aUEC per run
- Strengths: High-value gems, low investment
- Weaknesses: Requires transport, surface only
Multi-Crew Mining Ships
MOLE:
- Cargo: 96 SCU
- Mining Heads: 3
- Crew: 1-4
- Best For: Group mining operations
- Profit Potential: 300,000-600,000 aUEC per run
- Strengths: Triple mining power, good cargo
- Weaknesses: Requires crew coordination
Orion (Future):
- Cargo: Massive (exact TBD)
- Mining Heads: Multiple industrial
- Crew: Multiple
- Best For: Large-scale org mining
- Profit Potential: Millions per run
- Strengths: Industrial scale, refining onboard
- Weaknesses: Requires large crew, slow
Valuable Ore Types
Know what to mine:
High-Value Ores
Quantanium:
- Value: 88-110 aUEC per unit
- Instability: Extreme (15-minute timer)
- Location: Aaron Halo, Lyria, Wala
- Notes: Most profitable, time-sensitive
- Strategy: Quick extraction and immediate refining
Bexalite:
- Value: 40-50 aUEC per unit
- Instability: Low
- Location: Yela, Daymar
- Notes: Stable, good profits
- Strategy: Fill cargo completely
Taranite:
- Value: 35-45 aUEC per unit
- Instability: Low
- Location: Various asteroid fields
- Notes: Common, reliable
- Strategy: Bulk mining for consistent income
Borase:
- Value: 30-40 aUEC per unit
- Instability: Low
- Location: Aberdeen, Hurston moons
- Notes: Easy to find and extract
- Strategy: Good for beginners
Medium-Value Ores
Laranite:
- Value: 28-35 aUEC per unit
- Instability: Low
- Location: Aaron Halo, various moons
- Notes: Balanced value and availability
Agricium:
- Value: 25-32 aUEC per unit
- Instability: Low
- Location: Microtech moons
- Notes: Consistent profits
Hephaestanite:
- Value: 22-28 aUEC per unit
- Instability: Low
- Location: Crusader moons
- Notes: Common, easy extraction
Low-Value Ores (Avoid)
Aluminum, Beryl, Copper, Diamond:
- Value: 1-10 aUEC per unit
- Notes: Not worth cargo space
- Strategy: Only mine if nothing else available
Mining Head Selection
Optimize your extraction tools:
Prospector Mining Heads
Lancet MH1:
- Type: Precision
- Power: Low
- Best For: Delicate extraction, quantanium
- Strategy: Careful, controlled breaking
- Cost: ~12,000 aUEC
Hofstede MH2:
- Type: Power
- Power: High
- Best For: Tough rocks, fast extraction
- Strategy: Brute force breaking
- Cost: ~14,000 aUEC
Arbor MH2:
- Type: Balanced
- Power: Medium
- Best For: All-around mining
- Strategy: Versatile, good starter upgrade
- Cost: ~10,000 aUEC
Helix MH1:
- Type: Specialized
- Power: Medium with modules
- Best For: Advanced miners with consumables
- Strategy: Use with surge, catalyst modules
- Cost: ~16,000 aUEC
MOLE Mining Head Combinations
Triple Lancet:
- Best For: Quantanium precision
- Strategy: Coordinated gentle extraction
- Notes: Maximum control, minimal waste
Triple Hofstede:
- Best For: Tough rocks, speed
- Strategy: Brute force, quick fills
- Notes: Fast but less precise
Mixed Setup (1 Lancet, 2 Arbor):
- Best For: Versatility
- Strategy: Precision when needed, power when required
- Notes: Balanced approach for varied mining
Mining Consumables
Enhance your extraction:
Surge Module:
- Effect: Increases laser power temporarily
- Use: Breaking tough rocks
- Cost: ~500 aUEC per use
- Strategy: Use on high-value, high-resistance rocks
Catalyst Module:
- Effect: Reduces rock resistance
- Use: Making difficult rocks easier
- Cost: ~500 aUEC per use
- Strategy: Combine with precision heads
Stampede Module:
- Effect: Increases fracture speed
- Use: Quick breaking
- Cost: ~500 aUEC per use
- Strategy: Time-sensitive operations
Optimum Module:
- Effect: Widens optimal extraction window
- Use: Easier fracturing
- Cost: ~500 aUEC per use
- Strategy: Beginner-friendly, reduces mistakes
Solo Mining Strategies
Maximize profits alone:
Quantanium Hunting (Prospector)
Location Selection:
- Aaron Halo (best density)
- Lyria (good alternative)
- Wala (consistent finds)
Process:
- Scan asteroid field
- Look for 7,000+ mass rocks
- Scan for quantanium percentage (>30% ideal)
- Extract carefully (instability!)
- Rush to nearest refinery
- Refine immediately (15-minute timer)
Optimization:
- Use Lancet head for precision
- Carry Optimum modules
- Know refinery locations
- Have backup plan if timer runs out
Profit Potential:
- 32 SCU of pure quantanium = ~200,000 aUEC
- 2-3 runs per hour = 400,000-600,000 aUEC/hour
Stable Ore Mining (Prospector)
Location Selection:
- Yela for Bexalite
- Daymar for Taranite
- Aberdeen for Borase
Process:
- Scan surface or asteroid field
- Target high-value ores
- Fill cargo completely
- Refine at leisure
- Sell refined materials
Optimization:
- Use Arbor or Hofstede head
- Maximize cargo value
- Batch refining for efficiency
- Plan routes to minimize travel
Profit Potential:
- 32 SCU of Bexalite = ~80,000-100,000 aUEC
- More relaxed, no time pressure
Surface Gem Mining (ROC)
Location Selection:
- Daymar (Hadanite)
- Aberdeen (Dolivine)
- Microtech moons (various gems)
Process:
- Land transport ship near gem fields
- Deploy ROC
- Scan for gem deposits
- Extract with laser arm
- Return to ship when full
- Transport to refinery
Optimization:
- Use Cutlass Black or Freelancer for transport
- Scan from ship first to locate fields
- Fill ROC completely before returning
- Gems don't require refining (direct sale)
Profit Potential:
- 8 SCU of Hadanite = ~100,000-150,000 aUEC
- Lower risk, good profits
Multi-Crew Mining Operations
Coordinate for bigger profits:
MOLE Operations (3-4 Crew)
Crew Roles:
- Pilot/Scanner: Navigate and scan for deposits
- Miner 1: Primary extraction (precision head)
- Miner 2: Secondary extraction (power head)
- Miner 3: Tertiary extraction (balanced head)
Communication:
- Voice coordination essential
- Call out power levels
- Coordinate laser timing
- Manage instability together
Strategy:
- Pilot scans and positions ship
- All miners focus on single rock
- Coordinate power to optimal fracture point
- Extract efficiently, minimize waste
- Fill 96 SCU with high-value ore
Profit Potential:
- 96 SCU of quantanium = ~600,000 aUEC
- Split 4 ways = 150,000 aUEC per person
- Faster than solo due to triple mining power
Fleet Mining Operations (Org-Level)
Fleet Composition:
- 3-5 Prospectors or MOLEs
- 1-2 Combat escorts
- 1 Hauler (Caterpillar or larger)
- 1 Scout ship
Roles:
- Miners: Extract ore into own cargo
- Escorts: Protect from pirates
- Hauler: Collect ore from miners, transport to refinery
- Scout: Find best mining locations
Process:
- Scout locates rich asteroid field
- Miners spread out and extract
- Escorts patrol perimeter
- Miners transfer ore to hauler when full
- Hauler makes refinery runs
- Miners continue extracting
- Profits split or individual
Optimization:
- Use SCORG to coordinate locations
- Share scanner data
- Rotate escort duty
- Efficient ore transfer procedures
- Bulk refining for discounts
Profit Potential:
- 5 miners × 200,000 aUEC = 1,000,000 aUEC per cycle
- Shared profits or individual earnings
- Safety in numbers reduces losses
Refining Strategies
Maximize your refined output:
Refining Basics
Refinery Locations:
- Port Olisar (Crusader)
- Lorville (Hurston)
- Area18 (ArcCorp)
- New Babbage (microTech)
Refining Methods:
Dinyx Solventation:
- Speed: Fast (3 hours)
- Yield: ~40%
- Cost: Low
- Best For: Quick turnaround, low-value ore
Gaskin Extraction:
- Speed: Medium (6 hours)
- Yield: ~60%
- Cost: Medium
- Best For: Balanced approach
Ferron Exchange:
- Speed: Slow (12 hours)
- Yield: ~70%
- Cost: High
- Best For: High-value ore, patient miners
Thermonatic Crystallization:
- Speed: Very Slow (24+ hours)
- Yield: ~80-90%
- Cost: Very High
- Best For: Maximum value, quantanium
Refining Optimization
For Quantanium:
- Use fastest method (Dinyx)
- 15-minute timer doesn't allow slow refining
- Accept lower yield for speed
- Immediate refining essential
For Stable Ores:
- Use slowest method (Thermonatic)
- Maximize yield percentage
- Batch multiple loads
- Refine overnight or during downtime
Cost-Benefit Analysis:
- Calculate refining cost vs. yield gain
- Sometimes fast/cheap is more profitable per hour
- Consider opportunity cost of waiting
Mining Locations Guide
Best spots for each ore:
Aaron Halo (Quantanium Paradise)
Location: Between Crusader and Hurston Best For: Quantanium, Bexalite, Taranite Difficulty: Medium Risk: Low (but pirates possible) Notes: Highest quantanium density in Stanton
Lyria (Hurston Moon)
Location: Hurston orbit Best For: Quantanium, Agricium Difficulty: Medium Risk: Low Notes: Surface and cave mining available
Yela (Crusader Moon)
Location: Crusader orbit Best For: Bexalite, Taranite Difficulty: Easy Risk: Low Notes: Consistent, reliable mining
Daymar (Crusader Moon)
Location: Crusader orbit Best For: Hadanite gems (ROC), Taranite Difficulty: Easy Risk: Low Notes: Excellent for surface gem mining
Aberdeen (Hurston Moon)
Location: Hurston orbit Best For: Dolivine gems (ROC), Borase Difficulty: Easy Risk: Low Notes: Good beginner location
Risk Management
Protect your mining profits:
Pirate Threats:
- Mine in less populated areas
- Use escorts for valuable loads
- Stay alert to scanner contacts
- Have escape routes planned
- Don't mine alone in high-risk areas
Ship Loss:
- Don't overinvest in single run
- Keep emergency funds for ship claims
- Insurance covers ship, not cargo
- Factor in potential losses
Quantanium Timer:
- Know refinery locations
- Plan route before mining
- Don't overfill (leave time for travel)
- Have backup refinery if primary is busy
- Accept loss if timer expires
Market Fluctuations:
- Check prices before refining
- Don't refine if prices crashed
- Store raw ore if needed
- Diversify ore types
Organization Mining Economy
Build integrated mining operations:
Mining Division Structure:
- Mining Director (coordinates operations)
- Fleet Commanders (lead mining ops)
- Miners (extract ore)
- Escorts (provide security)
- Haulers (transport ore)
- Refiners (manage refining)
- Traders (sell refined materials)
Profit Distribution Models:
Individual Model:
- Each miner keeps their profits
- Org provides escorts and support
- Simple, motivates individual effort
Pool Model:
- All ore goes to org pool
- Profits split based on participation
- Fair distribution, team focus
Hybrid Model:
- Miners keep percentage (70-80%)
- Org takes cut for treasury (20-30%)
- Funds org operations and growth
Supply Chain Integration:
- Miners extract raw materials
- Refiners process ore
- Traders sell finished goods
- Profits fund org activities
- Self-sustaining economy
Use SCORG's economy tracking to manage mining operations, track contributions, and distribute profits fairly.
Advanced Mining Techniques
Expert-level strategies:
Optimal Fracture Technique:
- Bring rock to green zone
- Hold steady in optimal range
- Watch for fracture indicators
- Release at perfect moment
- Minimizes waste, maximizes yield
Instability Management:
- Monitor instability meter
- Reduce power when rising
- Use short bursts on volatile rocks
- Patience prevents explosions
- Practice on low-value rocks first
Cargo Optimization:
- Scan rocks before breaking
- Calculate ore value vs. cargo space
- Prioritize high-value ores
- Leave low-value fragments
- Maximize aUEC per SCU
Time Efficiency:
- Minimize travel time
- Scan while approaching
- Quick decision-making
- Efficient extraction
- Streamlined refining process
Common Mining Mistakes
Avoid these errors:
Mistake 1: Mining Low-Value Ore
- Don't waste cargo on cheap materials
- Focus on ores worth 25+ aUEC per unit
- Leave Aluminum, Beryl, etc.
Mistake 2: Overcharging Rocks
- Too much power = explosion
- Lost ore and potential ship damage
- Practice power management
Mistake 3: Ignoring Quantanium Timer
- 15 minutes from extraction
- Plan refinery route first
- Don't overfill cargo
Mistake 4: Solo Mining Dangerous Areas
- Some locations attract pirates
- Use escorts or mine in groups
- Don't risk valuable loads alone
Mistake 5: Poor Refining Choices
- Wrong method for ore type
- Not considering time vs. yield
- Refining low-value ore at high cost
Conclusion
Mining in Star Citizen offers reliable, engaging profits for solo players and organizations alike. By understanding ore types, optimizing ship loadouts, mastering extraction techniques, and coordinating with your org through SCORG's economy system, you can build a thriving mining operation that funds your organization's ambitions.
Whether you're a solo prospector chasing quantanium or leading fleet mining operations, the verse is rich with opportunity for those willing to dig deep.